Thursday, September 29, 2011

DIY Kids Applique T-shirt


The inspiration for this little project originally came from this post by Emily about how to make a boy's tie t-shirt:


So cute!  So I made a bunch of tie shirts for Gigi's 3rd birthday party for the boys to wear.  They turned out so cute, I decided to use the same basic principles to make Gigi and Bobo t-shirts to wear at their birthday parties.  Unfortunately Gigi's was in the washing machine with a pair of pants I had just made Bobo and did not realize that the dye in the fabric would bleed all over the entire load of clothes.  So they both have random shirts and pants with blue everywhere.  Gigi's super cute "3" shirt got a double-dose of blue dye so it had to go in the trash.

Bobo has worn his all summer though and I think it still looks pretty good:


As you can see it has frayed a bit but I thought that kind of "worked" with the gingham and bandana fabric so I haven't snipped off a single thread after numerous washings.


I actually thought it would fall apart after a few washings because I did not sew a zig-zag around the edges as instructed in the Saltwater Kids Tutorial above.  So when it didn't, I was thinking, it would be really cute and fun to do a little graphic on a t-shirt.  And considering how many stains my kids' white shirts have by the end of the summer, it would be a good way to help me get a little more wear out of those shirts.  Especially since here in Dallas it is almost October and still 100 degrees outside.

So here's all you need to create your own super cute applique t-shirt:
1 t-shirt (preferrably blank with no pockets)
cute scrap fabric (I think thin, cotton fabric works best)
iron
cute graphic 
regular scissors (to cut paper)
sharp fabric scissors
Steam-A-Seam 2 (see below)

This is Steam-A-Seam 2 (not sure what happened to 1?) and I had never heard of it prior to reading the Saltwater Kids Tutorial.  It is available at JoAnn, Hobby Lobby and I'm sure at various other places that sell sewing and crafting supplies.  Whoever created this product is a genius!


Disclaimer:  As usual, I am taking these pictures at night so excuse the quality (and shadows).  You get the jist.

1.  Lay out your shirt(s) so you know how big they are and about how large you'd like your graphic image to be.


2.  Go to Google Images and type in "sailboat graphic" or "cupcake graphic" (or whatever kind of picture you think would look cute) and troll through the bazillions of pictures the internet has to offer.  Once you find one that fairly closely resembles the shape you want, copy and paste it into a word document and enlarge it until it is about the size you think you want on your shirt.  Print it out and compare to your shirt.  If it isn't the right size, just keep playing with it until it is.  I err on the size of it being too large.  Too much is always better than not enough!


3.  Pick out some jazzy fabrics from your scrap pile.  I think these turn out best when you use a simple graphic but busy patterned fabrics.


4.  Create your pattern.  If the graphic you printed from the internet wasn't exactly what you wanted then modify.  I cannot draw at all but I knew exactly what I wanted my graphics to look like and if I have a picture that is somewhat close I can take it from there.


Yep, that is how I wanted it to look.


Eh, I wasn't thrilled with how my cupcake's scallops turned out the first time around.


Perfect!


5.  Cut out the pieces of your pattern.  (Do you love my scissors?)


6.  Pin the pattern to your fabric to keep it still while you cut out the fabric.  It is critical that you use sharp sewing scissors to cut out the fabric or else it won't look good.  


7.  Unpin your paper pattern from the fabric you cut out and use it to trace the same shape on a piece of Steam-A-Seam 2 paper.  Trace the shape slightly larger than your pattern piece so the Steam-A-Seam will overlap your fabric.  This will help prevent fraying.


8.  Cut out the pieces of Steam-A-Seam with your regular scissors.


9.  Now is the really fun part!  Lay your t-shirt on your ironing board and iron it to make sure it's smooth.


10.  Fold your t-shirt in half lengthwise, lining up the two edges of the collar and shoulders.


You are trying to find the exact middle of your t-shirt and I have found that the bottom edges don't always line up as well.  But the graphic is going on the upper half of the t-shirt so it's more important that it's centered correctly there.


11.  Iron down the middle of the shirt to create a good crease.


12.  Unfold your shirt and smooth it out flat, ensuring you can still see the center crease.


13.  Take your first piece of Steam-A-Seam and peel off the top layer.


14.  Lay your fabric down on the sticky, exposed fusible web.


15.  Do the same for your other pieces of fabric.  Place your fabric pieces exactly where you want them on your t-shirt.


16.  Press your iron down over your fabric for 10 seconds and do not move it.  If you can't iron your whole graphic down at once that is fine, just do it in separate parts.


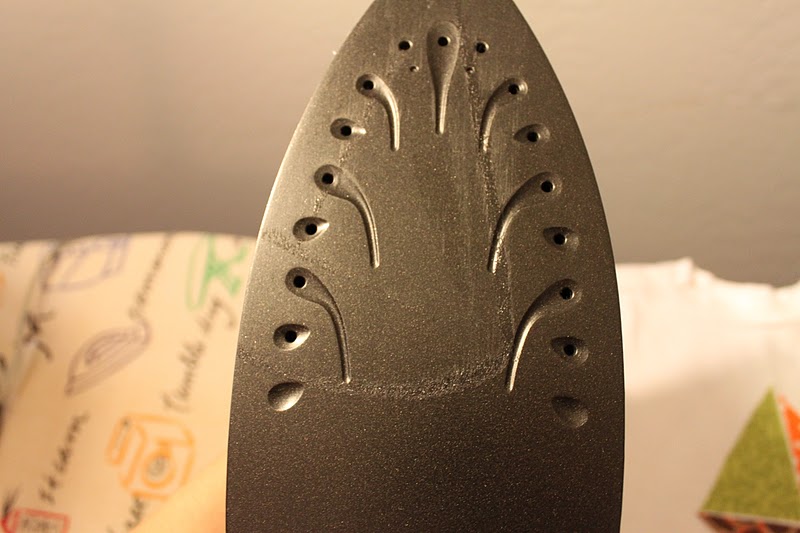
17.  Your fusible webbing that is overlapping the fabric will probably 1) make a spiderweb effect when you pull the iron up and 2) get all over your iron.  It's okay.  It doesn't hurt the iron or the fabric, even if you use it again on other t-shirts (like I did).  Once the iron was cool, I scraped it right off with my fingernail.


Voila!  You are done!  You can put them straight on!


18.  The hardest step:  getting your kids, who woke up on the wrong side of the bed/crib, to pose for pictures in your outfits.  Luckily, this one is into posing lately.  It only took a 30 minute temper tantrum :)


This one, not so much.  He just started walking so he wants to walk around everywhere like a big boy.  Luckily he still can't talk so he can't express his opinion about what he wears!


My outdoor photo session quickly deteriorated.


I think I'm going to get a little red poof ball thing to sew on top of the cupcake--wouldn't that be cute?


Have a great day!

Monday, September 26, 2011

Super Deluxe Chicken Quesadillas


I love Mexican food but I've noticed that a lot of dishes - like enchiladas - you can't make nearly as well at home as they can at a restaurant.  (I suspect with enchiladas it's because they use very, very thin tortillas which are not available at the grocery store.)  One thing that you can make just as good at home as they do in restaurants though, is quesadillas.  They are so, so easy (and fun!) to make.   Everyone in our house loves these and they actually have performed a miracle.  They got Gigi to eat spinach AND say that she liked it.

Tools required:  kitchen tongs, pizza cutter, 2 large skillets

Super Deluxe Chicken Quesadillas (with pico de gallo)

1 lb chicken breasts
salt
pepper
garlic powder
chili powder
ground cumin
Worcestershire sauce
Liquid Smoke
6 strips bacon
1 medium yellow onion, diced
1 small container mushrooms, chopped
1 bag spinach
4 cups Monterrey Jack cheese
12 flour tortillas
4 roma tomatoes
4 tbsp cilantro, chopped
2 tbsp lime juice

Season chicken breasts with salt, pepper, garlic powder, chili powder and cumin to taste.  Just put enough of each spice on the chicken to have a thin coating on the chicken.  Rub the spices in to make sure they are coating the chicken well. 


Place the chicken in a plastic bag and pour Worcestershire sauce and liquid smoke in it.  Just enough to coat all of the chicken breasts.  If you have time to marinate, place the bag in the refrigerator.  You do not have to marinate the chicken though if you're in a rush.  Cook the chicken any way you like.  Pan fry, bake in the oven or grill.  I always prefer chicken on the grill and luckily I have a husband who is a great griller! 


Heat a large skillet over medium heat.  Lay bacon strips in the skillet.  Whenever I lay bacon strips in a cold skillet it reminds me of my grandmother (on my mom's side), who would lay bacon strips in a skillet before she went to bed so she didn't have to do it in the morning.  My dad got a real kick out this.


While your bacon is frying, chop your two tomatoes. 


Add in 1/3 cup of the onions that you chopped earlier.  Also add the cilantro.


When your bacon is done, pour out all but about 2 tbsp of the grease.  If you don't have a metal coffee can to pour your grease into (do they even sell metal coffee cans anymore?) then you can pour the hot grease into a glass measuring cup and put it in the freezer.  Once the grease is frozen you can pop it out of the measuring cup and into the trash can.  DON'T pour bacon grease down the sink (it hardens in the pipes) and especially DON'T pour it in a plastic cup.  I am speaking from experience.  The grease will melt the cup and you will have hot bacon grease all over your kitchen.

Like how my camera focused on my Texas Tech potholder?  There wasn't time to go back and retake this action shot!


Add the rest of your onions into the hot bacon grease.


And mushrooms.  Stir to coat well.  Let them cook for about 5 minutes, stirring occasionally.


Add spinach.


Use tongs (best kitchen tool ever invented!) to toss the spinach around until it wilts.  ADub thought there should be a picture of me on the blog :)


This child has a sixth sense for knowing when the pantry is open.  I used to let them play in it, but Gigi has gotten so tall she can reach too many shelves and it was out of control.  We keep it locked with one of those zip-tie things so I guess that makes it very enticing.  The minute the door is open they are both in there in two seconds.


While your spinach is wilting squeeze some lime juice (about 2 tbsp, to taste) into your tomato, onion and chopped cilantro. 


She asked me to take a picture of her "all packed up."  I asked her to give me her pretty smile :) 


This is what she has packed up.


Once your spinach is wilted and liquid has reduced, add your crumbled bacon back to the skillet and stir to combine.  Remove the skillet from heat but leave your burner on.


Place your other skillet (I used a non-stick griddle) on the already hot burner and let it get warm on medium heat.  While the skillet is getting hot, chop your grilled chicken into bite-sized chunks.  Eat a few bites, because you are hungry and that chicken looks so good.  Nice grilling, ADub!


Prepare your quesadilla station so you have everything you need right by.  Tortillas, cheese, chicken, spinach mixture in skillet and Pam (not pictured).


Once your clean skillet is hot, spray with Pam, place one tortilla down and sprinkle a generous handful of monterrey jack on the tortilla.  I would use at least 1/4 cup on bottom and on top of your quesadilla.  They are going to be thick, so you need the cheese to hold everything together.


Add chicken chunks.


Scoop out some of your spinach mixture.  I find the tongs very helpful for this since there are so many small bits and they will help you place the mixture evenly over the quesadilla better than a spoon would.


Try to make sure your spinach is spread evenly over the quesadilla.  No one wants to eat a big glob of spinach (except ADub).


Cover spinach mixture with another 1/4 to 1/3 cup of cheese and top with another tortilla.  If your skillet is good and hot, you should just about be ready to flip your quesadilla.  To do this, gently place your hand on the top tortilla, slide a large spatula under the bottom tortilla and flip over quickly.  Even when I do this, sometimes my quesadilla ends up like this.


No problem, because you have your handy tongs!  Take your spatula and use it to hold down the bottom tortilla.  Using your tongs, slide the top tortilla over so it is even.  Voila!  Sorry I didn't get a picture--it requires two hands.


When your quesadilla is done, transfer it to a plate and let it sit for 2-3 minutes so the cheese can set.  Start on your next quesadilla.  This recipe makes 6 whole quesadillas.  ADub and I each ate one and the kids split one. 

Once it has cooled slightly, use a pizza cutter to cut into 4 pieces.  Add a spoonful of pico in the middle.


Serve to hungry family!

First she picked out all of her spinach and put it on her plate (see below).  Then near the end of dinner she declared "I like spinach!" and ate all of it.  Truly, these quesadillas performed a miracle!


The dude will currently eat anything but broccoli.


Want some?


This scene occurs a lot at our house.  I do not understand why they like getting in the toybox.